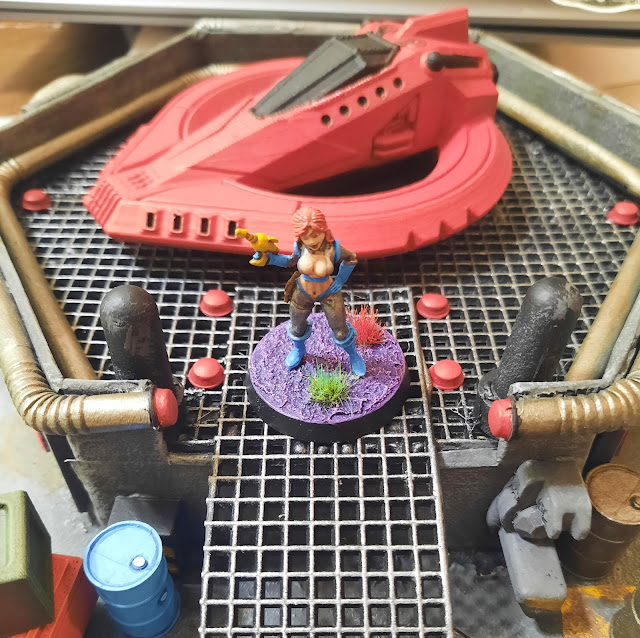
Betty stands in front of her spaceship on its landing pad, wondering when the idiot in charge of giving it a new paint job is going to stop buggering off on tea breaks and actually finish the bloody thing.
After a lot of painting and fannying around with various bits, including having really good ideas roughly four steps after I should have had them, the landing pad is done. Going by the comments on part one a lot of people had a good laugh when reading it, so hopefully this second part gets a chuckle or two.
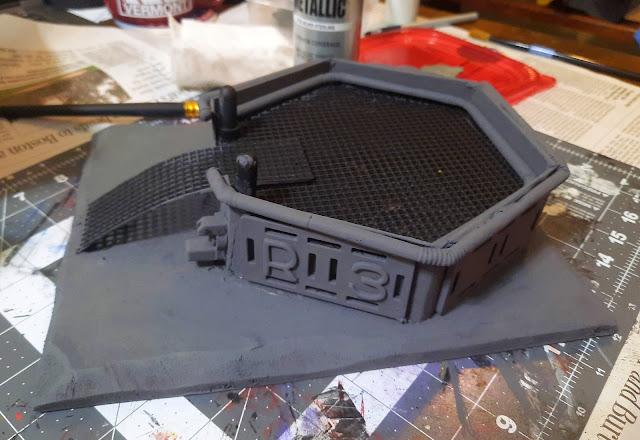
Here's the pad after being sprayed with matte black primer and left in the garage overnight. It's now back in the warm embrace of the kitchen and I've gathered together some brushes and cheap craft paints to finish it off.
First off it got a heavy overbrush with Deep Grey. I didn't want too much of the black primer to show through and only left it on the granny grating parts. This stage was a doddle and I only had to make one trip to the spare room to get, of all things, my coffee mug.
Once the Deep Grey dried I did a heavy drybrush with Pewter Grey followed by a second, slightly lighter once-over with Granite Grey. It's looking good, but on the other hand it appears to be made out of rock.
I've run out of homemade black wash so I had to knock up some more using black and dark brown craft paint, a few drops of flow improver and a lot of water...
... and then I slapped it all over with a cheap one-inch brush. There goes the highlighting. I put the pad outside on the hot tub cover for a couple of hours so the wash would thoroughly dry in the hot weather.
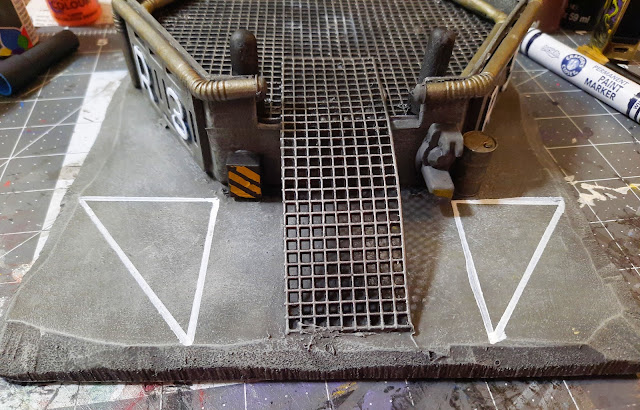
After redoing the highlighting I moved on to filling the huge gaps to the sides of the ramp. I knew what I wanted to do — hazard stripes — I just had to, you know, actually do it. I used a metal ruler and a white paint pen to draw a couple of triangles and looking at them a couple of days later, I wonder what the hell made me think these looked OK. Oh well.
Then I painted the grating with Iron Warriors and Plate Metal, and gave the metallic bits a once-over with my homemade orange wash IT'S GETTING THERE!
I used the paint pen and ruler to draw some stripes (using the word in its loosest sense) and then painted over them with Averland Sunset.
The stripes were stippled with Deep Grey and Pewter Grey to make them look weathered and match the rest of the base OH GOD WILL THIS THING EVER COME TO AN END
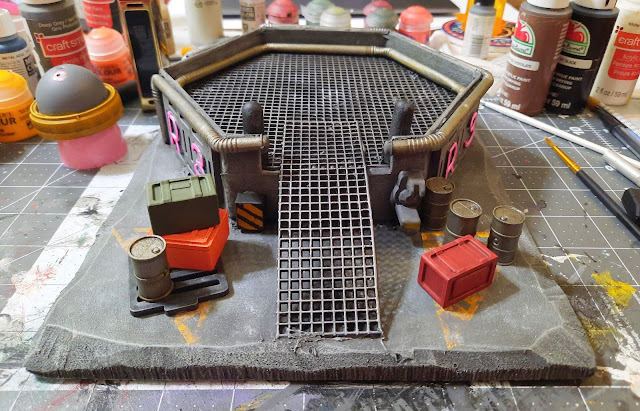
I gathered together a load of barrels and crates and painted them different colours, then glued them into place on the base. There's a couple behind the pad too. You can see that I was going for a neon effect on the R3 bit with Fluorescent Magenta, but it didn't work so I painted them red and orange.
Here's some shots of the final model, complete with Betty and her half-painted spaceship:
So after all that, was it worth it? Oh yes. I'm very happy with it, although there are a couple of areas that could be improved; for starters, I should have left an inch or so of foamboard in front of the ramp. The straws around the outside of the walls are a bit wonky and I should have used superglue instead of the hot glue gun for those bits.
But on the whole it works really well and makes a change from modern-day buildings or fantasy stuff. The spaceship will be finished off soon and there'll be a post on it, and of course I'll be making more scenery before the end of the challenge. Till next time, amigos!


Excellent finish to the project Matt, all the work has certainly paid off, as you now have a one of a kind stunning piece of scenery, which would liven up any gaming board. The spaceship is coming on well, and will also count to the scenery challenge.
ReplyDeleteThanks, Dave! Building it was certainly a bit of a slog and I really need to plan these things out better. The spaceship is almost finished, so yay!
DeleteGreat piece of scenery and well worth all the effort and frustration, thugh I did find it a bit strange that after al the effort with the yellow stripe warning signs that you allbut covered them up with detritus.
ReplyDeleteLooking at it now, you're not wrong Joe — after putting in the effort to paint the stripes I covered them up way too much LOL!
DeleteThat turned out to be a really nice build! I like the ideas and it painted up nicely. It's funny, I was just debating on gluing all my loose single containers together to make scatter terrain. Now, if I had gone and done that...I wouldn't necessarily be able to add them to terrain pieces! So, this was a good reminder on what I could do with those bits. And is this the first time I'm seeing Betty? Wowza, what a model!
ReplyDeleteCheers, Faust! Betty really is a wowzer of a model, she's by Reaper if you want to get one for yourself :-)
DeleteShe reminds me of some video game character, but I can't place it. Space Quest perhaps?
DeleteShe reminds me of the wife from The Jetsons.
DeleteI looked at that heading picture and thought "nicely done" but when I started reading I discovered the post was about the landing pad instead! ;-) Brilliant job on that, Matt, although I don't think I'd have covered up those excellently weathered warning stripes on the ground!
ReplyDeleteThanks, John, and yes I shouldn't have covered those stripes up so much. Oh well!
DeleteJust love this, a triumph Sir! Fabulous painting and lovely little touches, consider the googly eyes idea stolen, really finish it off well.
ReplyDeleteCheers, Michael, and feel free to steal the googly eyes idea as I nicked it from somewhere else LOL!
DeleteNow that has come out very nicely mate! some great touches there.
ReplyDeleteCheers Roger.
Thanks, Roger, I'm happy with it so at least there's that LOL!
DeleteVery nice work on this scratch built piece of terrain, mate! While MDF kits can be made to look great, there is something special about scratch built terrain. While Betty looks great with it, I would love to see more pictures with other finished models on or around this piece of terrain as just about anything you've painted lately will look great on there!
ReplyDeleteCheers, Jeff, and I'll try to sort out some photos with different sci-fi minis on the pad.
Delete