

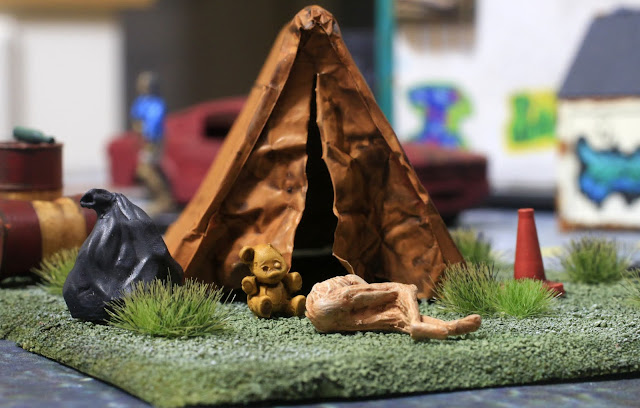
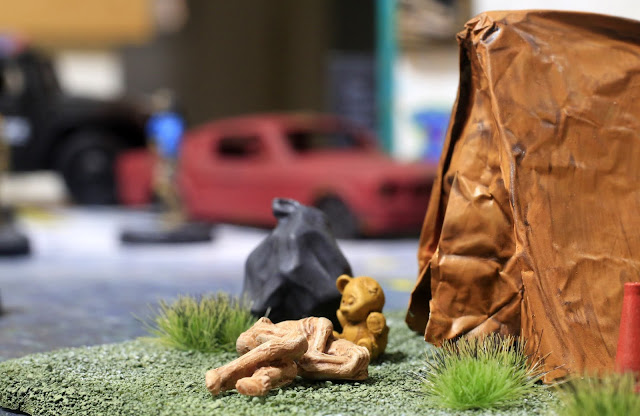
A couple of zombies stagger past an abandoned tent on a patch of wasteground behind the inevitable convenience store. The decomposing body of its owner lies outside, oblivious to the shambling undead.
I'm indebted to Dave over at Wargamesculptors Blog for the inspiration behind this little project. Back in early October, Dave posted about sculpting some tents for his scenery range, and that gave me the idea to do a tent of my own. Please note that Dave made a modern dome tent out of greenstuff with astonishing attention to detail, whereas I'm going to do something more in line with my skill levels.
Instead of a nice modern dome tent, I went for an old (or oldish) A-frame like the ones I used to go camping in the Forest of Dean. Fun facts: one time me and my best mate Gareth went camping there, I parked my car in front of the tent opening. We were on a slope, and let's just say that if the handbrake on my 1983 VW Polo had failed you wouldn't be reading this. On another expedition into the wilds of Gloucestershire my mum gave us £20 for food, which we spent on one (1) pack of Rich Tea biscuits, one (1) pack of Marlboro cigarettes, and twenty-four (24) cans of lager. Oh, those teenage years.
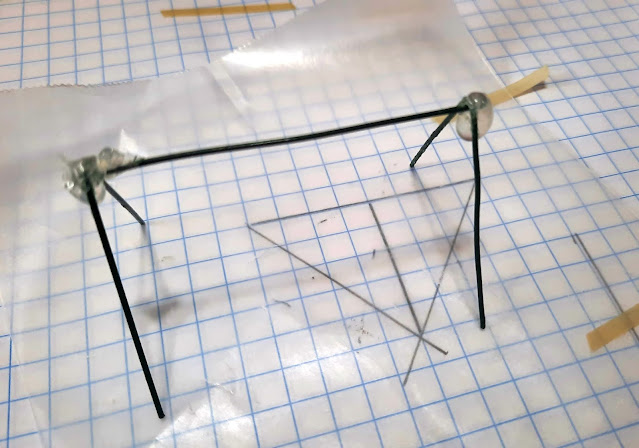
Anyway, I used floral wire to make the tent frame and used graph paper to get the diagonal bits the same. Floral wire is cheap (I think it was $3 for 20 18-inch lengths in Walmart) and is pretty strong. Once the two end pieces were bent into shape, I measured the top bit, cut it, and glued it all together with two large blobs of hot glue.
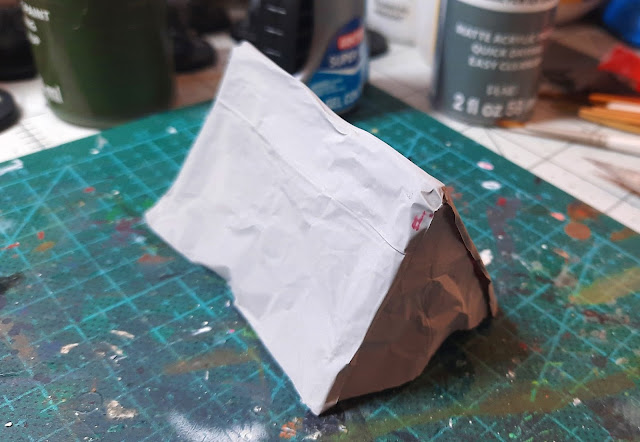
Then came the big question: what to use for the actual tent material? I tried paper towel soaked in thinned PVA, but it disintegrated. I thought about giving it another go, but then another idea occurred: why not use aluminium foil? I cut two triangles and superglued them to the A bits, and then cut a larger piece, folded it in half, and glued it to the top piece of wire. I had to snip off some of the dried hot glue to get a better fit, but it worked. The pic above was taken after I'd sprayed it with grey primer.
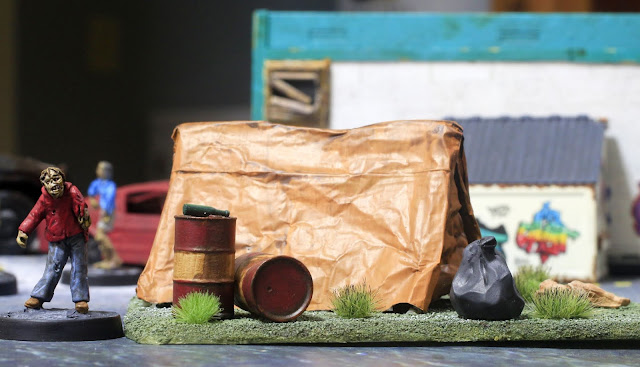
OK, so I missed taking photos of the next few steps, so here's a bunch of pictures of the finished tent and base. I painted the tent Orange Brown and gave it a coat of thinned Nuln Oil, which made it look dirty but to be honest looks what it is: brushed on. Oh well, I guess it can be explained away as rain streaks. I gave the outside a quick drybrush with Light Brown and then cut a slit in one end to mimic the tent's opening, bent the corners out a bit, and painted their insides Orange Brown to match the exterior.
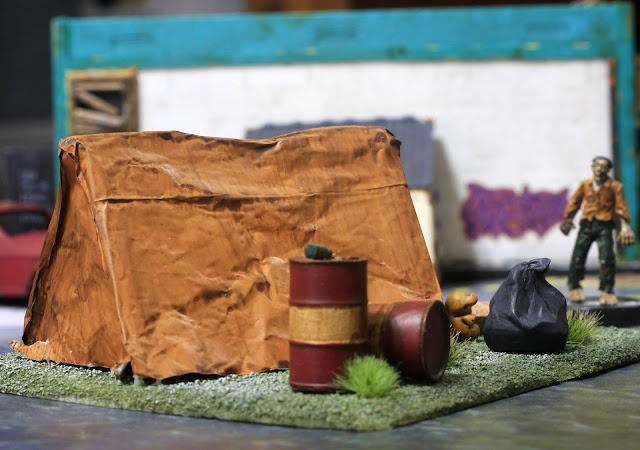
With the tent done, I moved on to the base and other bits. The base itself is just foamboard covered in sand and painted with the same cheap craft paints I used for my billboard, Marshy Green and English Ivy. I daubed random areas of it with homemade black and green washes, then drybrushed it with a mix of English Ivy and Granite Grey, another craft paint.
Once the base dried I glued the tent in place, then added the scenic bits. The oil drums are ones I painted about three years ago and appear on my blog's header image; I just ripped them off their base to use them with the tent. In a happy accident they match the one on the base of my billboard.
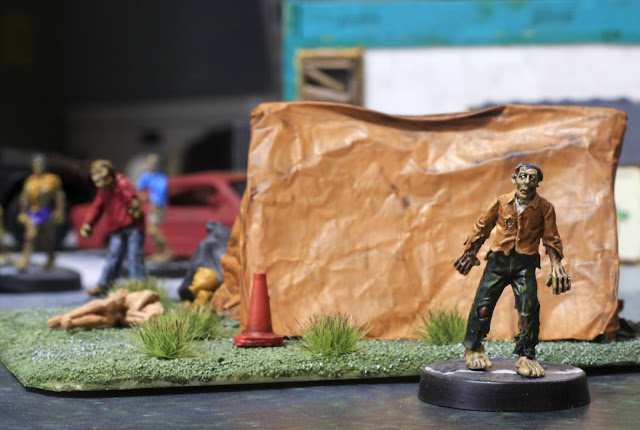
I'm pleasantly surprised at how it came out. The foil really works as canvas and it was easy to get folds and creases to make it look more realistic. The whole ensemble has an abandoned and despairing look about it, and the forlorn teddy bear adds another level of horror.
So that's the end of Zombtober and Apocalypse Me, and I had a great time making and painting entries for them. Mo'Vember is kicking has kicked off, so I'm scrabbling around to find a figure with a beard. I have a beard, but unfortunately I'm the wrong scale for this challenge.
Great work on the tent Matt, looks abandoned and the extra details add to the feel of the piece.
ReplyDeleteOn a side note you can use cotton material dipped in PVA as well to make fabric materials, as the glue dries you can push folds into it, and gives a great canvas texture to the piece. Any loose strands on the material can be trimmed once dry ( also works for banners )
Thanks for being a great participant
Thanks, Dave, and thanks for unwittingly giving me the inspiration to do this :-) I have seen real cotton cloth being used at this scale, but it didn't cross my mind at the time and to be honest if it had, I can't think of anything we own that would have worked, let alone explaining to Alicia why I'd been cutting up our bedsheets LOL!
DeleteI had a great time with Apocalypse Me, and thanks for hosting it!
Indeed this hobby can require some extreme get out of jail free moments ! LOL
DeleteNo problem at all
Terrific stuff, Matt. I love it. How delicate is it to handle and store? Hopefully, its sturdy to survive the tabletop?
ReplyDeleteThanks very much! And that's a good question LOL! It's glued to the base, so it's not like I'll be picking the actual tent up. The wire is pretty sturdy, so unless I put a finger through the foil I should be OK.
DeleteGreat scratch-build and it makes a lovely vignette, very reminiscent of a few 'deserted' camps I've seen in a compter game (can't remember thenameof it). I use cheap cotton hankerchiefs for canvas btw.
ReplyDeleteCheers, Joe, I really was going for an abandoned camp look so I appreciate you saying that. And I'll have to keep an eye out for some cheap hankies!
DeleteExcellent work Matt! The corpse reminds me of the one from the very first Walking Dead episode - the woman, very emaciated, just dragging herself along and looking even more wretched than a regular zombie would.
ReplyDeleteThanks, Dai! I can totally see what you mean about the corpse, it does resemble the one from the TWD's first episode.
DeleteThat is a very sad looking little scene mate, so great work! The tent came out a treat, the foil canvas looks really good, You could have added a cardboard of polystyrene inner to strengthen it, but as you say as long as you just handle the base it should be fine.
ReplyDeleteLove the teddy bear, just adds to the effect, it's an old story that news teams used to carry dolls and teddies with them into war zones and disaster area's to sit on piles of debris when filming or taking photo's to "add" to the feeling of despair and loss. 😀
Cheers Roger.
Thank you, Roger! The teddy bear was a late addition to the scene but when I saw it in the bits box I knew I had to use it.
DeleteThis is a very inspired piece of terrain! The post-apocalypse genre is perfect for stuff like this and I really like all of the little additions you put on the base. I think the tent looks very worn down (in a good way of course). I painted up a tent a while back and found it difficult to not make it look clean so kudos to you for making something that fits this setting better :)
ReplyDeleteCheers! I think the key to making something like this look old and dirty is to be as random as possible when adding the weathering. The tent should be more faded as if it's been bleached by the sun, but then again it works.
Delete