I saw this last month on one of the few Black Magic Craft tutorial videos I hadn't watched and wanted to give them a go. Luckily Alicia had bought some cheap hollow plastic eggs in Walmart at Easter, so I had the basic ingredients. In the interests of full disclosure, I will be copying a lot of BMC's work in terms of techniques as he did an awesome job.
I found the eggs but needed a base. I remembered some plywood discs I picked up at a Michael's sale a couple of years ago and dug them out as they'd be perfect.
Man, my hands are fat. Straight off there was a bit of a problem: the plastic is so thin that trying to cut it with a knife without squishing in the sides and slicing my fingers was a pain. I ended up snipping triangles with my side cutters, which resulted in the plastic cracking. No worries, eggs do have a tendency to crack.
I still have a huge tub of filler under my desk (it's about the only place to store it as our spare room is like a bomb site) so I covered the base with it using a plastic spatula. It was pretty easy to do, especially after wetting the base with a damp paper towel.
Instead of waiting for the filler to dry before gluing on the egg, I just stuck it into the wet filler and spread more of it inside to hide the join and the two little holes in the back. I put the whole thing on a shelf to dry and did the dishes and laundry. Believe me, when your girlfriend refers to you as "above average" you need to work hard to stay at that level.
After checking it the filler was nowhere near dry, so I ended up leaving it overnight. I kept some of the broken-off pieces to add to the base, and I can snip more off one of the unused eggs if needed.
The following morning the filler was dry, so I moved onto the next stage: stuffing toilet paper soaked with watered-down PVA glue into the egg to give it some kind of filling and texture. I spread the paper over the lip of the egg onto the base to tie the two together and to make it look like the albumen is flowing out, and I cannot believe I can remember "albumen" from my 1980s GCSE Biology classes.
The plastic is very smooth, and the exterior needs some details. BMC puts a thick "rope" of wetted paper across his to act as an umbilical cord and hide a mould line, but I wanted to something different. I made little veins out of more glue-soaked toilet paper and slid them into place with a toothpick. The back of the egg has a moulded hollow so I started the veins there as a way of filling it. All these bits of paper are held on with thin PVA so I'm hoping they'll stick properly.
I over-thinned the PVA and the inside was still soaking wet after two hours, so I guess this is going back on the shelf for another night.
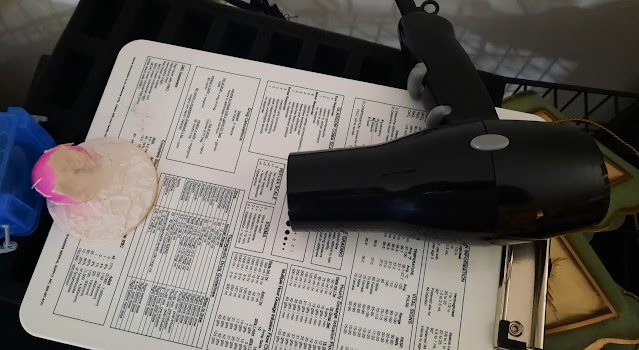
Well here we are TWO DAYS LATER and it still wasn't dry. I had to break out the big guns: my hairdryer. Yes, I bought myself a cheap one as I was sick of plodding up and down the stairs to use Alicia's. I set it up as shown above and just left it run while I got on with painting other stuff. After half an hour the paper had dried. Result!
I took it down to the garage to spray-prime it black. I was a bit iffy about using the black spray paint after it went all lumpy on my Little Sisters of Purification, but then again some more texture can't hurt. It turned out pretty good as you can see in the top photo. The egg's finally at a point where I can do something with it, so be sure to tune in again at an unspecified future date!


Hmmmm... Interesting stuff. Thoroughly enjoyed your decision-making for this one, Matt, and seeing how you approached each stage, bit by bit. Despite the drying issue its all looking good, imho, so I'm looking forward to seeing how this turns out.
ReplyDeleteI'm also looking forward to seeing how this turns out LOL! It looks great primed, now it's down to the painting.
DeleteGreat work so far Matt, and nice attention to detail. If you do another one you could heat up the top and collapse it down a bit as if it has collapsed when broken open and lost some of it's integral strength
ReplyDeleteOooh that's a good idea, thanks for the suggestion!
DeleteAs Simon said above interesting stuff, dose this mean we will be getting the inhabitant of this in next years Monster May(hem)?
ReplyDeleteCheers Roger.
I was thinking of adding a monster, or something like tentacles, but then I remembered this is Season of Scenery and not Monster May(hem) LOL
DeleteGreat use of 'scrap', I recently used a "KInder" egg for insertioninto a building and I epathise with all the difficulties of working with the plastic.I too use snips to get the shape I wanted and also used several layers of filler to get the finish I wanted - what a pain.
ReplyDeleteThanks! The plastic is a real pain to work with, and once the primer dried I had to coat the egg with chinchilla dust to add some texture. So that's an extra wait I wasn't planning on.
Delete