

As I said in a previous post, I've been watching a lot of scenery tutorials on YouTube recently and the other day one caught my eye in a kind of, "Hey, I could do that" way. So I gave it a shot.

The basic idea is to make a pillar of rock that looks like part has been carved into a skull, so after some digging around I found the basic ingredients.
We've had so much stuff delivered since moving in that I'm now the proud owner of a ton of polystyrene foam, and that's not counting all the huge sheets lying on the basement floor that have yet to be either transported to the spare room or thrown out. The two above are from the box that contained Alicia's wardrobe. The guy in the video uses the pink insulation foam but I don't have any yet.
The skull is a cheap plastic one from a bag of 10 I bought in Michaels back in 2018. I think the bag cost $1.99 thanks to a Halloween sale. Of course I have no idea where the other nine skulls are, so I'm happy to just have this one.

I cut about a third of one of the foam blocks off and then hacked it up with a craft knife to get rid of its regular shape. At some point I'll get around to sweeping up all the little white bits under my desk. I tried to seal it with a mix of black paint and Mod Podge but gave up as it was taking forever, so I just moved onto the next stage: covering it with filler. I thought I'd have to buy some but luckily our builder left behind a huge tub of it, and seeing as I paid for it, I'm using it. I doled some out into a jar and plastered it on the foam using a cheap plastic spatula.

After leaving it overnight to dry, I realised I'd need some kind of base for the piece. I cut a two pieces of chipboard, glued them together and then trimmed them to the size and shape I wanted. Before doing that I shoved a screw into the bottom of the foam to give it a bit of weight. The rock was then stuck to the card using my new hot glue gun (from the local dollar store, but it works!)

The skull is made from thin, soft plastic and was easy to cut up. I used dots of superglue to fasten it to the foam, and then used more hot glue to seal any gaps. It's the first time I've used a hot glue gun and it worked pretty well considering it cost $5.

I didn't realise that hot glue sets in seconds, so I was able to get to the next stage pretty quickly. Using more filler I blended the skull into the rock and also gave the skull itself a more rocky texture so it wouldn't look too smooth. It was at this point that I saw the jaw is sticking out too much. I should have noticed this while test fitting it and trimmed it down more.
Once all that had dried I coated the whole thing with a mix of Mod Podge and black craft paint to seal and prime it.

I put filler on the base, and once it dried I glued on some gravel and dust I collected from my drive. I should have just stuck it into the filler when it was wet, but this is me we're talking about. The base was also coated in the black Mod Podge.

Painting time! I wanted to do this one more rock-like than my ruined chapel so I stuck to greys — Dark, Somber, Neutral, Ash and Silvergrey, to be precise. Somber was binned as it's too blue. This pic is before I used the lighter greys and a touch of Off-White. You can still see the Somber Grey under the skull's eye on the left.

I also wanted it to look old and mossy, so I mixed up my own green wash the same way I did for my rust wash, this time using a mix of greens. Mutation Green, Black Green, Olive Green, Olive Grey, a bit of Chocolate Brown and a touch of black did the trick. Once mixed with a ton of water, the rock got a thorough coating.
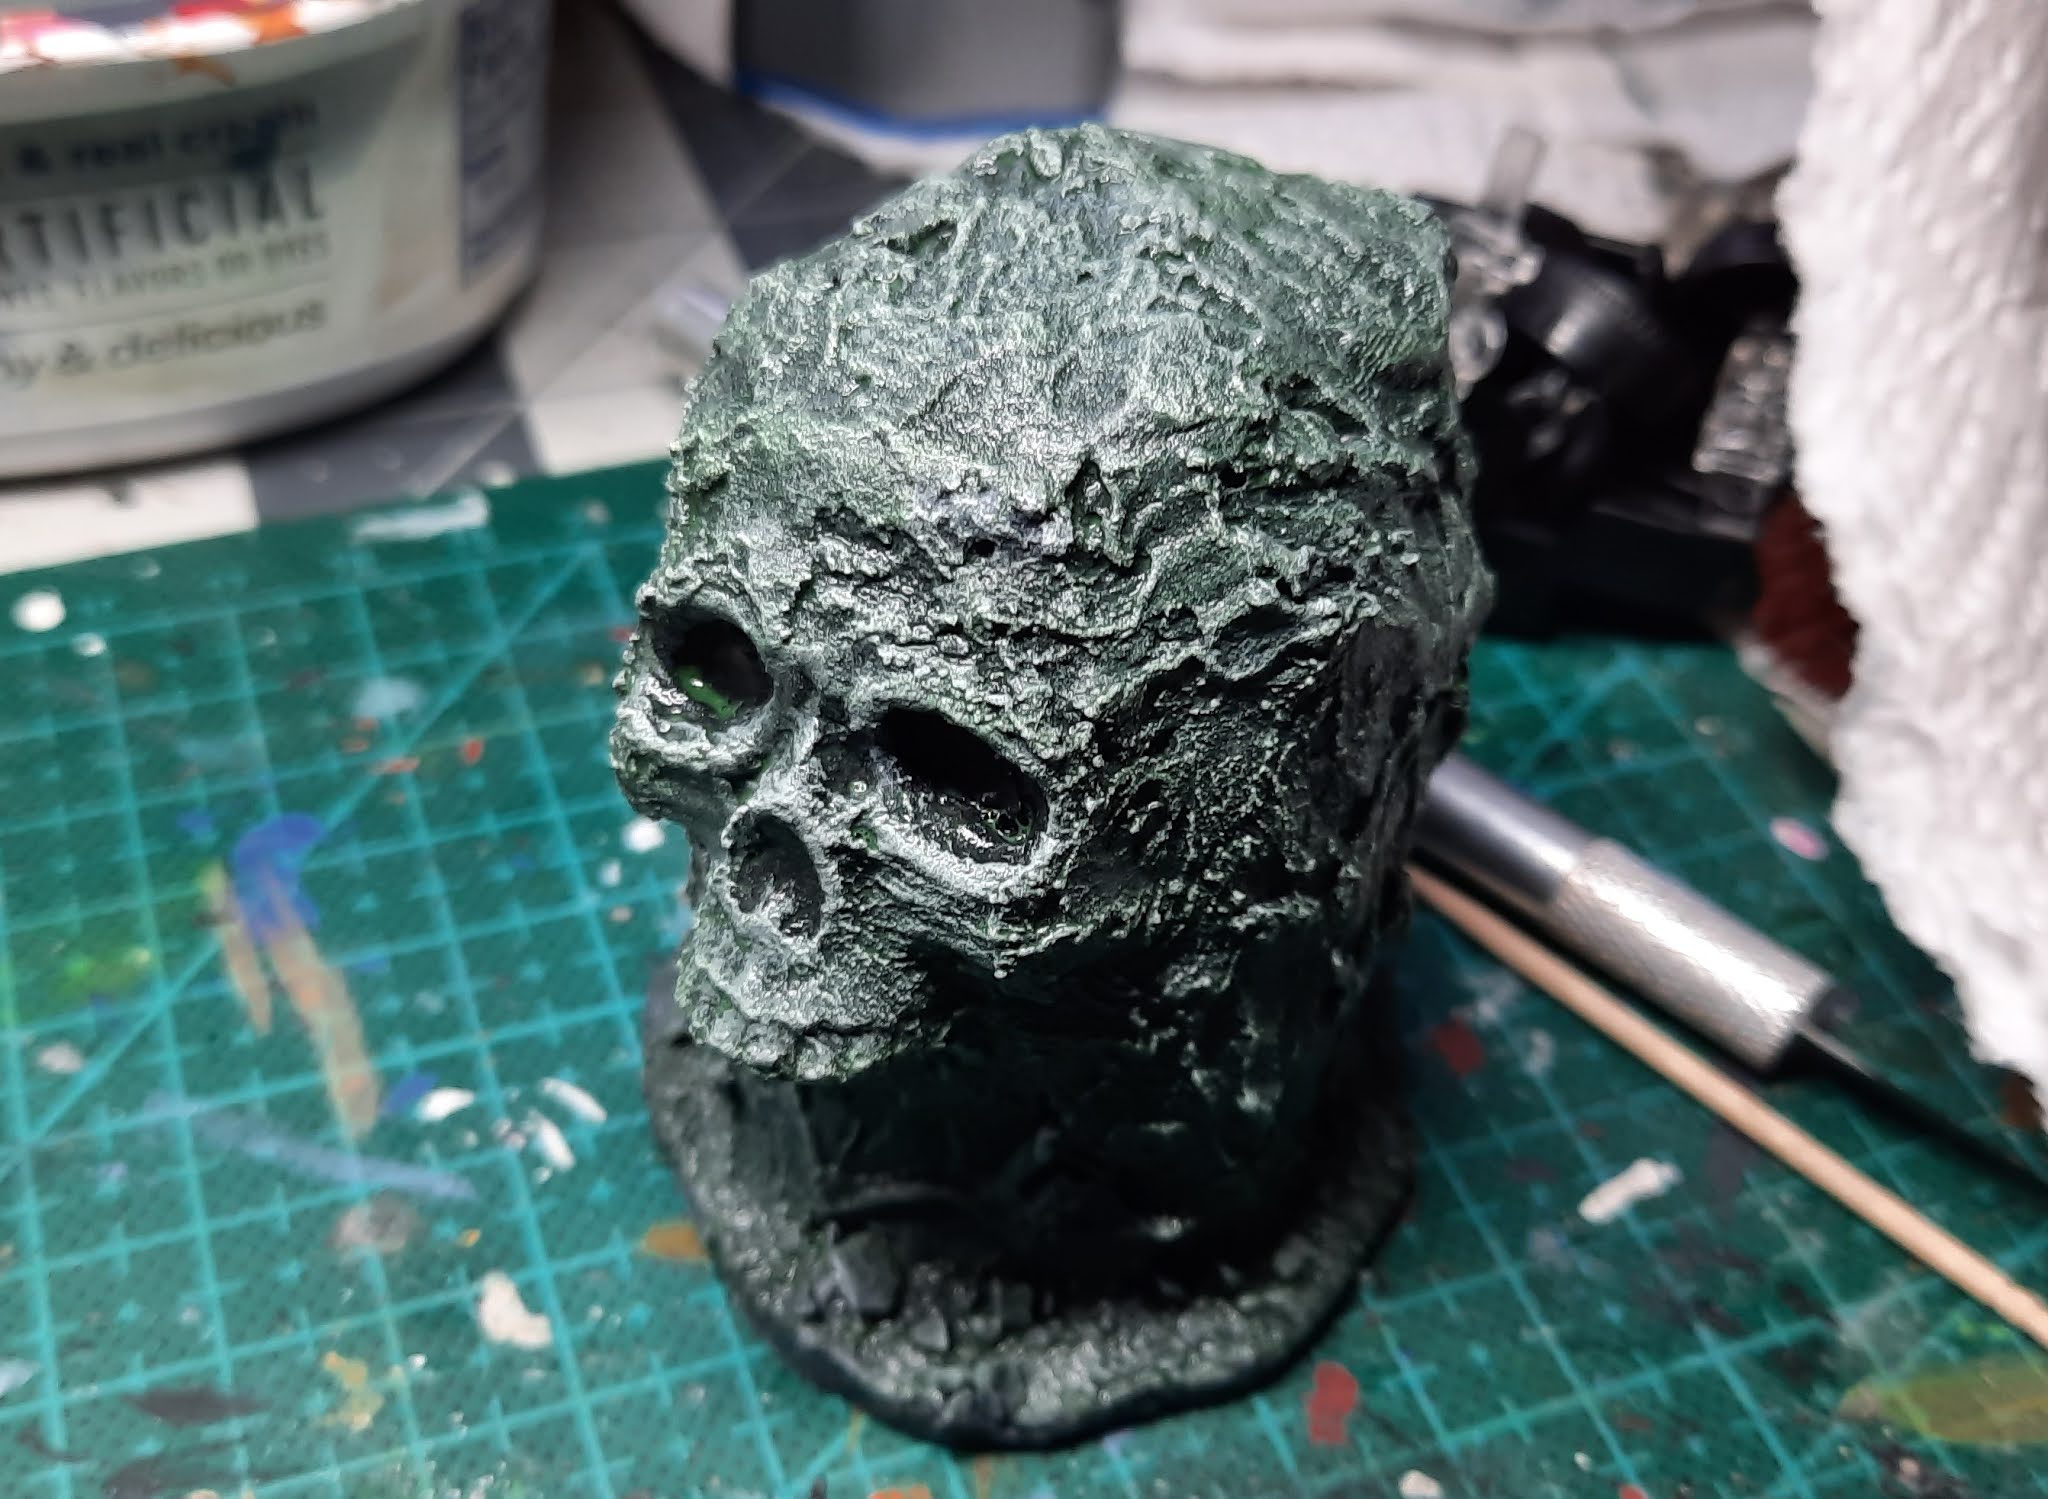
Here's the rock after one coat of the green wash. It's certainly given it a greenish look, and it's certainly made it creepier. Like the rust wash, I know this'll dry more transparent than it looks now so I gave it another coat, then a light drybrush with Ghost Grey to bring out the highlights.

Time for some flock. I've recently bought more — the Fine Turf and Earth Blend have arrived, and the Burnt Grass and Leaf Foliage are due soon. I started by covering the base with the blended stuff, and then moved on to the rock. My basic rule was, do it randomly but don't make it look like the skull has hair and eyebrows, and don't put it on symmetrically.

It sticks really well to brushed-on watered-down PVA glue and looks good.

"Don't put it on symmetrically," he says. Duh. After getting an Amazon notification today that the other flock was delayed, I decided to just use my older stuff to finish it off.

Here it is, all finished until I decide to bugger about with it again, probably when the Leaf Foliage turns up. I'm really happy with it, and I can't believe how straightforward it was to make and paint. Dave is probably reading this thinking, "Hang on till Summer of Scenery!"


Ulirr looks happy to be hanging out at Skull Rock. Then again, looking at his manic face, he's probably happy to be hanging out anywhere.

And this is the first time this month I've remembered about Imperial Rebel Ork's t-shirt challenge, which is the easiest challenge in the world as it simply involves getting dressed. Here's me in my Outpost 31 t-shirt, as The Thing is one of my all-time fave movies. I'll try to remember another shirt if I get something else posted this month.
Wonderful piece of scenery Matt, I'm sure you have more scenery to get done at the start of August ! LOL
ReplyDeleteCool T-shirt, and agree the Thing was a great movie
Thanks, Dave, it was a ton of fun to do, even figuring out how to get it looking right was enjoyable. I have scenery planned for this year's SoS and I'm really looking forward to it!
DeleteTerrific piece of scenery, and a great how-to as well, that last picture made me think it would be really cool if you made one with an cave entrance or door under the top jaw, and perhaps the bottom jaw at the bottom as a step, perhaps with some creepers hanging down covering the entrance? Sorry my minds off on one now, top work mate!!!
ReplyDeleteCool shirt too, I didn't realise this was the "The Thing" T shirt challenge, as IRO posted on the other days too.
Cheers Roger.
Thank you, Roger. I had fun making it! You're right, some kind of cave or even a hidey-hole for a little monster would work really well under the jaw.
DeleteI may have to steal this idea. It looks great when it's done; and I've looked at those bags of skulls more than once trying to come up with a use for them...
ReplyDeleteSteal away :-) You can get the skulls on Amazon really cheap.
Delete