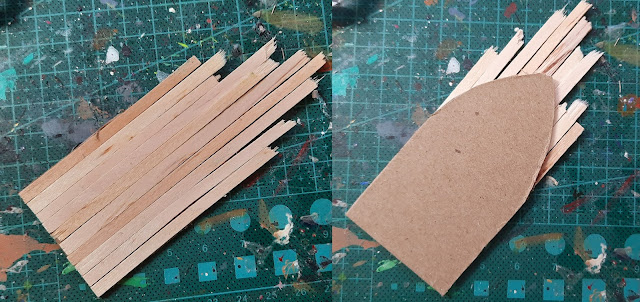
As much as I love my ruined arch, I have one major issue with it as a background for photos — namely the huge gap in the middle. Right now I can really only use it as a backdrop if I place the mini against the left or right sides, unless I want the bomb site that is my desk to ruin the effect. So today I had an idea. Why don't I make a door?
I used the arch as a template to draw its outline onto chipboard. A quick note: chipboard in the UK is the crappy wood that MFI and IKEA furniture is made from. In the US, that's called particle board. Chipboard this side of the pond is just thick cardboard.
I covered the chipboard template with coffee stirrer sticks. As you can see, I did this with my usual neatness and attention to detail.
Once I'd trimmed the wood down to the outline of the template, I had this. It's not 100% perfect but it's slightly bigger than the opening so the overlying stones will give the top a rounder shape, he says hopefully. The door was given a coat of cheap black craft paint as I'm not using Vallejo primer or acrylic on what's got the potential to be a complete cock-up.
I was a bit stuck on colours for the door, so I googled around and found these two examples. The one on the left is from Tintern Abbey in Wales, and the other is from Jedburgh Abbey in Scotland. I'm positive I've got photos I took of the Tintern door on my PC but it's not set up yet (on the other hand, at least it's out of the garage so yay!). The Jedburgh door would be a lot easier to paint, and while the Tintern door would be more difficult it's much more visually appealing. After a lot about 10 seconds of deliberating I went for the Jedburgh one.
I painted it with three thin coats of Vallejo Orange Brown and washed it with Army Painter Strong Tone, and then totally forgot to take a photo of it. Duh. I decided to leave highlighting the door for now and to just get on with making it.
After the paint and wash had dried, I suddenly realised that I hadn't actually tried fitting it to the arch. I tested it, and this happened — the top is fine but the flagstones prevent it from going up against the bottom. Oh yay, well done me.
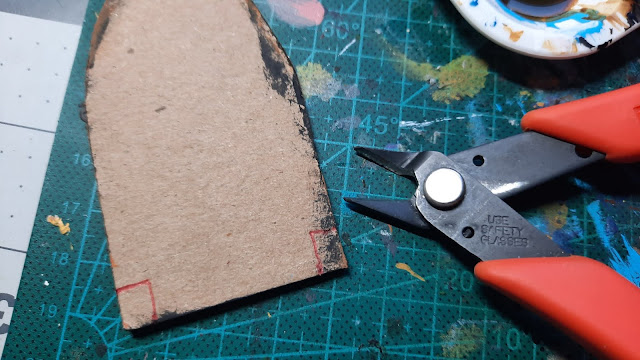
It's time for surgery. I marked out the bits that needed to be excised and set about them with the side cutters. Note the USE SAFETY GOGGLES embossed on the cutters, which is sage advice given the little bits of cardboard and wood shot off like rockets. One is behind the armchair and I'm sure it's happy so I left it there, and the other had a safe (and very soft) landing on my belly.
I'm thinking of a phrase, and without meaning to give too much away it rhymes with "clucking bell". I cut too much off. Remember when I mentioned my usual attention to detail? This is what happens when it bites me on the arse. So, what to do? Find out in the next thrilling installment, coming soon to a theatre near you!


Ha ha! it might have been less stressful to have build the ruined church!
ReplyDeleteSeriously the door looks good, what about adding a cross piece along the bottom to hide the gaps, either in wood or metal effect?
Cheers Roger.
Seriously, I could not believe I didn't plan for the flagstones. Oh wait, it's me, of course I didn't :-) I am planning on putting a crosspiece across the bottom of the door and one across the middle, and hopefully that'll work. If not it'll take me all of about 10 mins to remake the door.
DeleteGreat start on the door Matt, and look forward to seeing how it develops
ReplyDeleteIt's developing pretty well, Dave! I've been working on it and it's almost done.
Delete